Menu
Call This Thursday Get $50 Off Today
24 Hour Services
7 Days a Week
Call This Thursday Get $50 Off Today
24 Hour Services
7 Days a Week

One of the most annoying bathroom plumbing problems is a leaky shower or faucet. It does not only keeps you awake at night, but also increases your utility bills if not fixed. Moreover, gallons of water go to waste unless a leaky shower is repaired. There are several causes of this plumbing problem and two of which are a leaky faucet handle and a shower faucet. In some bathrooms, there are faucet handles for hot and cold and overtime, the rubber seal or washer can wear out and leaks. Here is a step by step look on how to fix a shower faucet leak.
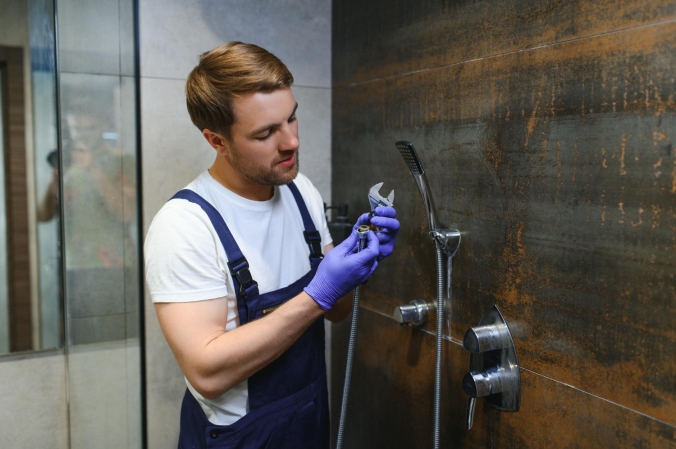
Step 1:
Check the water leak coming from the shower head and feel if it is cold or warm. This is to ensure you diagnose where the leak is coming from.
Step 2:
Remove the faucet handle. Depending on the design of the faucet, you either have to unscrew the handle with the screw exposed and positioned at the center or at the side. For newer shower handle designs, you might need to remove the cap that covers the screw. Ensure to remove the cap slowly and gently to prevent scratching the finishing.
Step 3:
After removing the cover cap, get a screwdriver and loosen the locking screw by turning it counterclockwise. Once it has been removed, set it aside. Next, remove the handle from the body of the faucet. If this is can be hard to remove with your bare hands, you can use a faucet puller.
Step 4:
With the handle removed, follow it up by removing the sleeve and the trim that is on the faucet stem. Remove the faucet stem using a deep socket. Place it on the hex nut of the faucet stem and turn it counterclockwise to remove the assembly. Unscrew the faucet stem from body of the valve.
Step 5:
Get the replacement kit and replace the seals, O-rings as well as the flat washer found at the end of the faucet stem.
Step 6:
To replace the faucet stem, repeat the steps but in reverse and do not forget to lubricate the thread of the stem with plumber’s in Los Angeles, CA grease and tighten it in the body of the valve. Replace the handle to check the valve. If there are no issues, complete the assembly and seal the trim to the wall using a tub caulk.
Step 1:
Ensure to turn off the water valves. They are either found in the basement or bathroom. You can also opt to turn off the main water valve if no one is going to use water in the next hours. Turn on the shower to ensure all remaining water goes out.
Step 2:
With the use of pliers or wrench, remove the shower faucet.
Step 3:
After removing the shower faucet, remove the old rubber gasket. Replace the rubber gasket and see to it that it does not move while inside the faucet.
Step 4:
Replace the shower faucet and use the pliers or wrench to put It back in place. Turn on the water valve and check if the leak is gone.
A kitchen stays busy all day. When something slows down the flow of…
A good look inside a drain line tells you the truth faster than…
A sewer line problem interrupts daily life quickly. Rooter Guard sees this…
A plumbing system reaches a point where repairs stop making sense. Many homeowners…
A dead disposal can bring a busy kitchen to a stop. When that…

Water pressure can make or break your plumbing experience… almost literally. Low water pressure can make washing pots and pans a nightmare, and high water pressure can push water through joints and crevices before causing a burst pipe. Water pressure problems are sneaky and often start small, but they usually…
Learn More


