Menu
Call This Thursday Get $50 Off Today
24 Hour Services
7 Days a Week
Call This Thursday Get $50 Off Today
24 Hour Services
7 Days a Week

Silicone caulk is an effective sealant for windows, sinks, tiles and glass door frames. However, overtime, molds and mildew can accumulate on the caulking especially when it is often gets wet or damp, like in bathrooms. If you want to remove silicone caulk and replace it with a new one, you can do it yourself. Some might be an easy job while others can require patience and more time. With these tips, you can handle this home maintenance project by yourself. First, here are some important things you need to know.
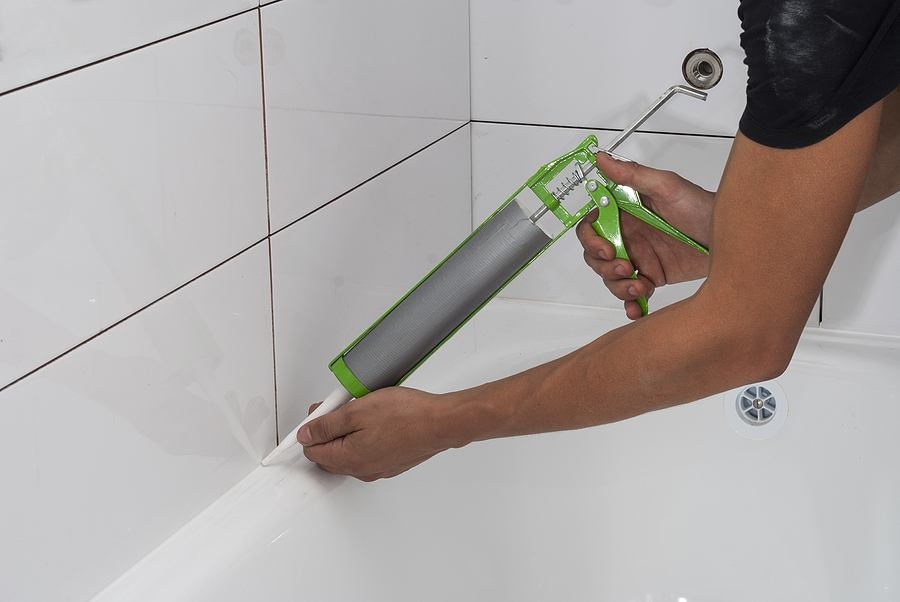
Also called rubberized silicone caulk, this sealing material is known for its flexibility and durability that can last for years. It serves as a water barrier and can also keep air inside or sealed. These qualities make them perfect from showers, sinks and the like. In installing new silicone caulk, it is important to remove the old one because the new installation will not adhere if placed on top of the old silicone caulk.
Step 1: Clean the tile thoroughly if you are going to install a new silicone caulk over the old one. Do this before removing the old silicone caulk. This is important to ensure grime and soap residue are removed.
Step 2: There is no product that can remove silicone caulk or dissolve it despite its rubberized property. However, there are products available like the caulk remover gel that will help soften the silicone and make it easier for you to remove it. Apply the silicone remover on the areas where the caulk should be removed. Although directions might include letting it sit for about three hours, you might prefer to let it stay overnight to ensure it can handle tougher silicone caulks that have been hardened and been applied thickly.
Step 3: Get a knife or a cutter to remove the caulk. It is important to handle the caulk remover tool correctly to prevent damaging the tub or the shower as you loosen the caulk. Just pull the caulk and remove it using pliers or tweezers.
Step 4: For the debris or the pieces of silicone caulk that are still on the shower, simply scrape them off with a toothbrush or a putty brush.
Step 5: Remove the mildew and molds using a portion of bleach mixed with a gallon of water and clean the surface with water.
Step 1: Remove the excess silicone caulk with blade or knife. Pour hot water to loosen the caulk and make it easier to remove the material.
Step 2: Mix flour and water to create a paste. Create the mixture with about a cup of flour dissolved in several tablespoons of water just enough to create a paste. Apply the paste over silicone caulk and let it stand until it sticks with the material.
Step 3: After the paste has dried, remove it with water and the silicone caulk, by this time, has already attached to the paste and will be detached from the shower.
A kitchen stays busy all day. When something slows down the flow of…
A good look inside a drain line tells you the truth faster than…
A sewer line problem interrupts daily life quickly. Rooter Guard sees this…
A plumbing system reaches a point where repairs stop making sense. Many homeowners…
A dead disposal can bring a busy kitchen to a stop. When that…

Water pressure can make or break your plumbing experience… almost literally. Low water pressure can make washing pots and pans a nightmare, and high water pressure can push water through joints and crevices before causing a burst pipe. Water pressure problems are sneaky and often start small, but they usually…
Learn More


